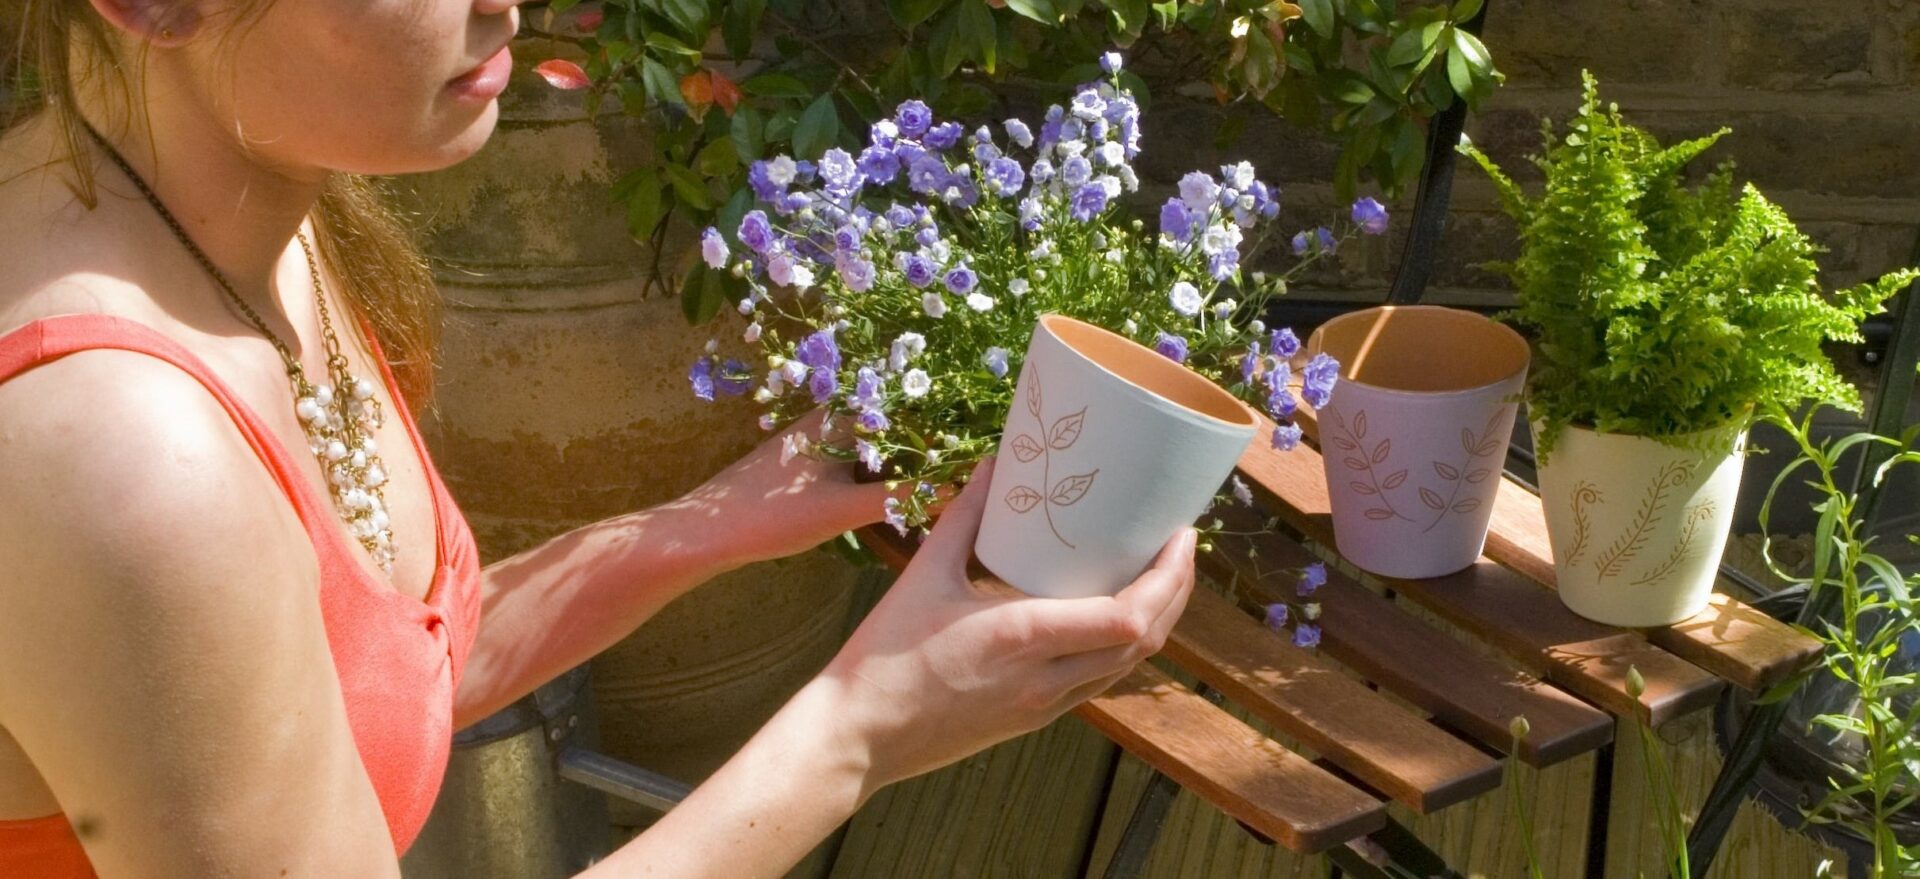
With summer just around the corner, it’s time to get your house ready for the season. What better way than to decorate some terracotta plant pots to brighten up your space. Our friends at Dremel have kindly put together this fun and simple three-step DIY project.
What you’ll need
- Dremel Multi-tool
- Diamond Wheel Point 4,4 mm (7105)
- Emulsion paints in pastel colours (or any shades of your choosing!)
- Pencil
- Paintbrush
- Terracotta pots
- Safety goggles, gloves & dust mask
Step 1
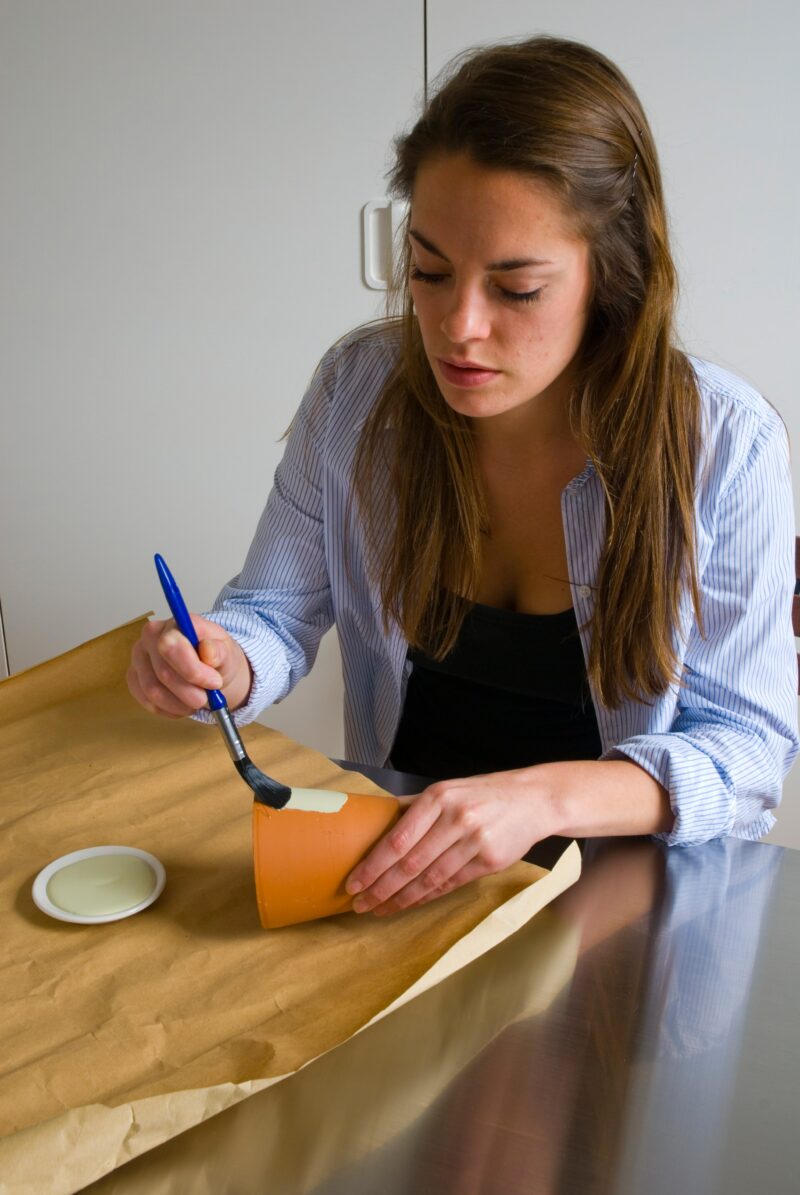
Firstly start by painting the terracotta pots. Let the first layer dry and then apply a second coat for full coverage.
Step 2
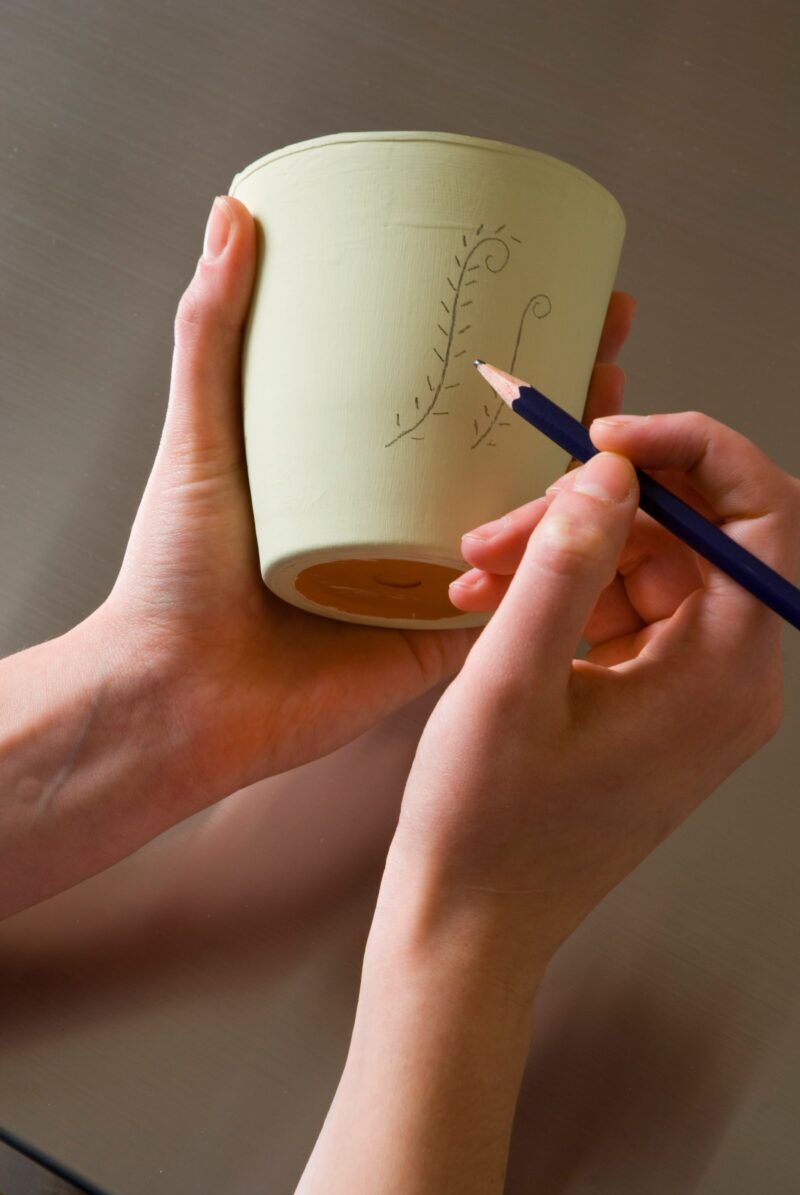
Once the painted pots are completely dry, you can start drawing your design. We recommend you use a pencil for this, try to keep the lines quite faint, this way you can easily remove any mistakes with a rubber.
Step 3
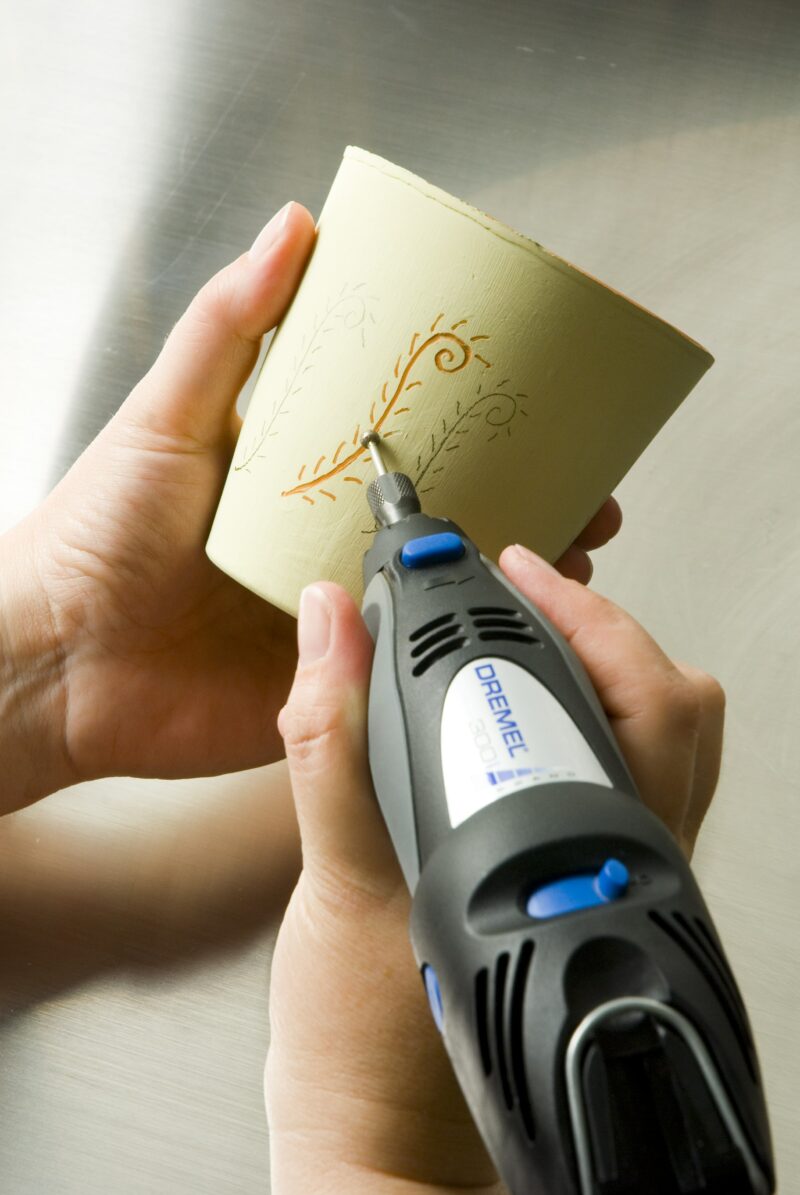
When you’ve decided on your final design, pop on your safety goggles, gloves and mask, and carefully follow the pencil lines on the pot using your Dremel Multi-tool with a diamond wheel point 7105 accessory. It may be a good idea to get some practice by using a spare pot (or use the base) before you start the final design. Brush off any dust with a soft, dry paintbrush. And that’s it! A simple three step DIY.

Aren’t they beautiful? You can get as creative as you want with the designs and the colours.
We hope this post has given you some inspiration to create some pretty terracotta pots for your home. Let us know if you decide to give this a go tag us and Dremel on Instagram using #OakFurnitureland and #dremel_ea